Deploying through the Azure Portal – File, Object, and Data Lake Storage
Deploying through the Azure Portal
Storage accounts can be easily deployed through the Azure Portal. Once an account is deployed, users will be able to use it to create the storage service needed for their solution. Use the following steps to create an Azure storage account through the Azure Portal:
- Log into portal.azure.com and search for Storage accounts in the search bar at the top of the page. Click Storage Accounts to go to the storage accounts page in the Azure Portal.
- Click Create to start choosing the configuration options for your storage account.
- The Create a Storage Account page includes six tabs with different configuration options to tailor the storage account to fit your needs. Let’s start by exploring the options available in the Basics tab. Along with the following list that describes each option, you can view a completed example of this tab in Figure 4.1.
a. Choose the subscription and resource group that will contain the storage account. You can create a new resource group on this page if you have not already created one.
b. Enter a name for the storage account.
c. Choose the primary Azure region for the storage account.
d. Choose the performance tier for the storage account. If you choose premium, you will be asked to choose from the following three account types: block blobs, file shares, and page blobs. This example will continue with the standard tier.
e. Choose the type of redundancy you want the storage account to have. If you choose GRS or GZRS, you will be given the option to enable read access.
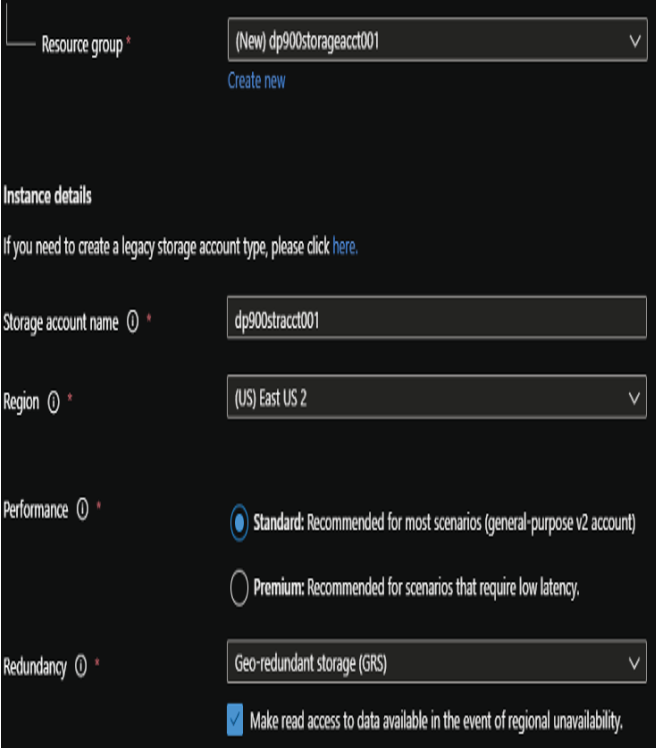
FIGURE 4.1 Create a Storage Account: Basics tab.
- The Advanced tab allows you to enable specific security and storage settings. The following describes the configurable settings in this tab.
a. The first set of configuration options relate to security. They include enabling or disabling secure transfer for REST API operations, infrastructure encryption, anonymous public access for blob storage, access via account keys, Azure Active Directory authorization, and the minimum TLS version. We will use the default configuration settings for this example, as shown in Figure 4.2.
b. The next setting will allow you to enable the hierarchical namespace for ADLS. We will cover when to enable this setting later in this chapter in the section “Azure Data Lake Storage Gen2,” but for now understand that this option should be enabled if the storage account will be used to store data used by distributed analytics workloads. It’s important to note that this setting cannot be changed once the storage account is deployed.

FIGURE 4.2 Create a Storage Account: Advanced tab security configurations.
c. The next set of configuration options are specific to the storage services that will be available in the storage account. An important setting to consider here is the access tier you would like to configure for the storage account. This will depend on whether the account will be accessed frequently (Hot) or infrequently (Cool).
d. The last setting to consider on this page is related to Azure Files. If you will be creating an Azure file share in the account, you will need to consider how large the file share will be. While the standard storage limit is 5 TB, enabling the large files setting will increase the limit to 100 TB. Figure 4.3 illustrates an example of the advanced storage settings with the default options.
- The Networking tab allows you to configure network access and connectivity for your storage account. There are three options to choose from for network configuration: Public endpoint (all networks), Public endpoint (selected networks), and Private endpoint.
a. Public endpoint (all networks) opens access to the account to applications from any network. This option removes network isolation as a data security component to the storage account configuration. Figure 4.4 illustrates an example of the Networking tab with this option enabled.
b. Public endpoint (select networks) allows access to specific subnets in a selected VNet.
c. Private endpoint allows you to attach a private IP address from a VNet to the storage account, limiting access to applications that can communicate with the VNet.
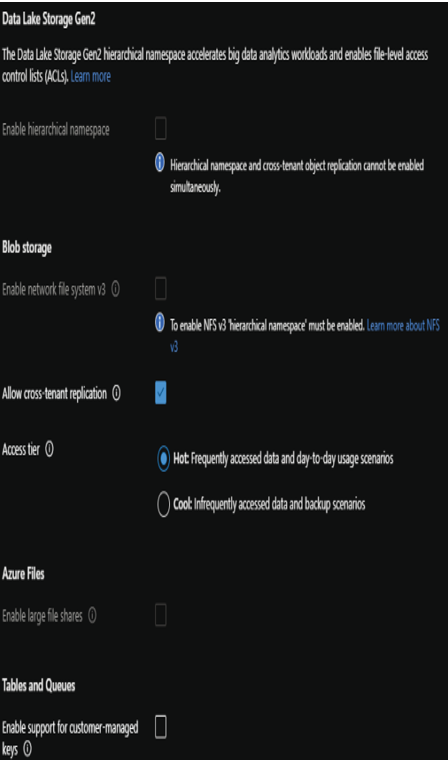
FIGURE 4.3 Create a Storage Account: Advanced tab storage configurations.
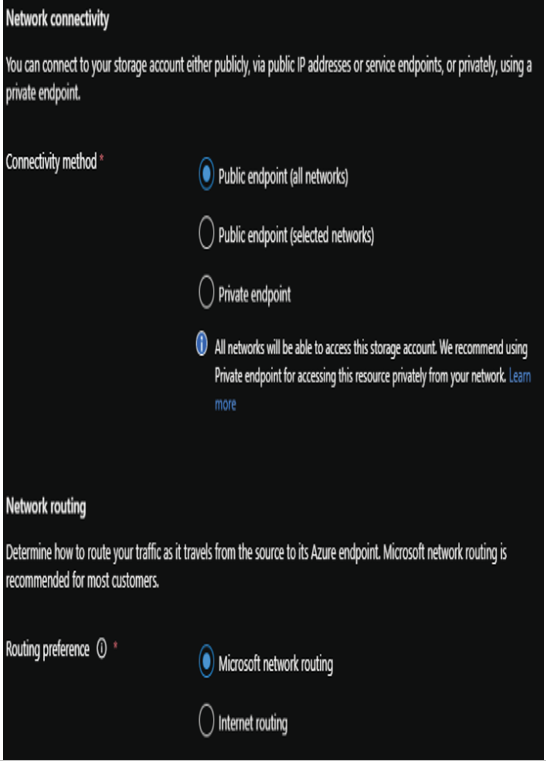
FIGURE 4.4 Create a Storage Account: Networking tab.
- The Data Protection tab allows you to protect data from accidental deletes or modifications, enable version management, and set time-based retention policies for blob versions. Figure 4.5 illustrates an example of the data protection settings with the default options.
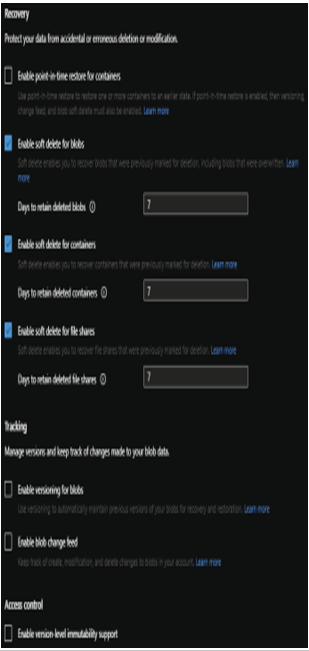
FIGURE 4.5 Create a Storage Account: Data Protection tab.
7. The Tags tab allows you to place a tag on the storage account for cost management.
8. Finally, the Review + Create tab allows you to review the configuration choices made during the design process. If you are satisfied with the choices made for the instance, click the Create button to begin provisioning the storage account.